

How to Use Seashells in Landscaping: Ideas, Benefits, and Step‑by‑Step Guides
Seashell Supply on 30th Dec 2025
Seashells aren’t just for jars on the mantel. Crushed or whole, they can become paths, mulch, borders, and decorative accents that look beautiful and quietly work hard behind the scenes. Used thoughtfully, they’re eco‑friendly, durable, and can even help your plants thrive.
Why seashells belong in your landscape
Before we get into the “how,” it helps to understand the “why.”
- Soil health boost: Crushed shells are rich in calcium carbonate, which slowly breaks down and can help balance soil pH and support strong plant cell walls and root development.
- Natural pest deterrent: The rough, sharp texture of crushed shells makes slugs and other soft‑bodied pests think twice about crossing, reducing the need for chemical controls.
- Better drainage and aeration: Mixed or crushed shells improve soil structure and drainage, helping prevent waterlogging while still holding some moisture.
- Moisture retention: Shell mulch helps keep water in the soil longer, which is especially helpful in sunny or windy locations.
- Long‑lasting and eco‑friendly: Shells are durable, break down slowly, and can often be sourced as a byproduct from the seafood industry, making them a sustainable landscaping material.
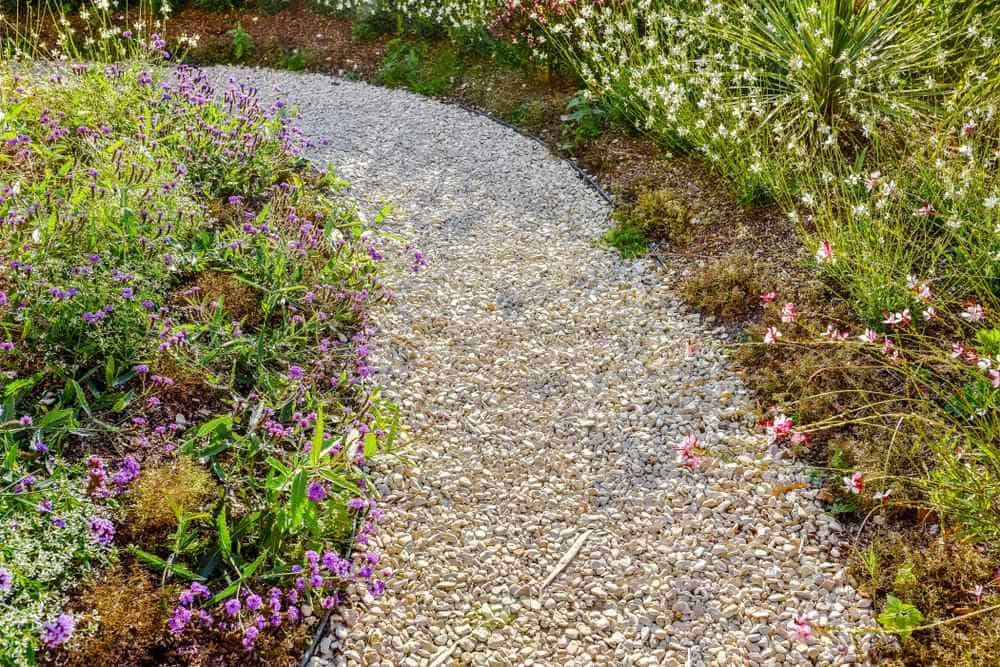
Idea 1: Crushed seashell garden pathways
Crushed shells make gorgeous, firm, and lightly reflective paths that feel coastal without screaming “beach theme.” Clam and mixed shells are especially popular for walkways and driveways because they compact well and are durable.
Best shells for paths
- Clam shells: Great for pathways and driveways; rustic, natural look.
- Mixed shells: Versatile, good drainage and compaction, ideal for general paths.
Step‑by‑step: Seashell garden path
- Plan your route
- Define the path: Use a hose, spray paint, or rope to outline your path.
- Check slope: Ensure water will drain away and not pool on the path.
- Prepare the ground
- Remove vegetation: Dig out grass and weeds down about 2–3 inches.
- Level the soil: Rake smooth, removing rocks and roots.
- Optional: Lay landscape fabric to reduce future weeds.
- Add a base layer
- Gravel base: Add 1–2 inches of compactable gravel or road base.
- Compact: Use a hand tamper or plate compactor to create a firm foundation.
- Spread the crushed shells
- Depth: Aim for about 1–2 inches of crushed shell on top of the base.
- Distribute evenly: Use a rake to spread shells uniformly along the path.
- Compact and finish
- Compact again: Walk on the path or use a tamper to settle shells.
- Top up if needed: Add a little more shell where it looks thin.
- Edge the path: Use metal, brick, or stone edging to keep shells in place and give a crisp finish.
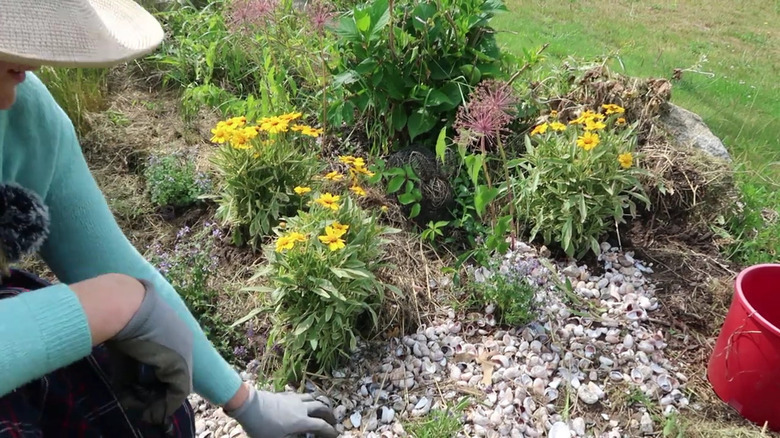
Idea 2: Seashell mulch around plants
Seashells can act as a long‑lasting, bright mulch that protects soil and supports plant health. Crushed oyster and mixed shells are especially useful around garden beds.
Benefits of shell mulch
- Protects soil: Reduces erosion and helps retain moisture.
- Improves soil over time: Releases calcium carbonate as it breaks down, supporting plant growth and balancing pH in some soils.
- Deters pests: Sharp pieces can discourage slugs and snails from attacking tender plants.
Step‑by‑step: Using shells as mulch
- Choose where to use mulch
- Ideal spots: Flower beds, shrub borders, herb gardens, and around perennials.
- Avoid: Plants that prefer very acidic soil (like blueberries), unless you know your soil needs more alkalinity.
- Prepare the area
- Weed thoroughly: Remove existing weeds and their roots.
- Water the soil: Lightly water so the soil is moist but not soggy.
- Apply the shells
- Layer thickness: Spread shells in a 1–2 inch layer around plants.
- Leave space at stems: Keep a small ring of bare soil around trunks and stems to prevent rot.
- Maintain over time
- Top up as needed: Add more shells every year or two as they gradually break down.
- Monitor soil pH: If using heavily, especially oyster shells, check that the pH stays in a good range for your plants.
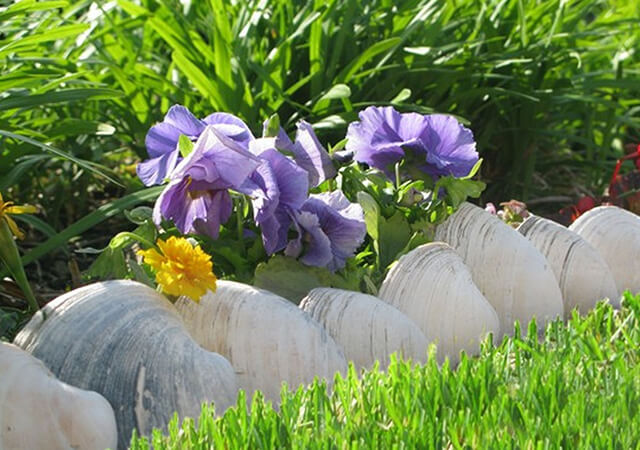
Idea 3: Seashell borders and edging
Whole shells make charming, low‑maintenance edging for beds, pathways, and small garden “rooms.” Clam, conch, and larger decorative shells work well along borders.
Step‑by‑step: Seashell garden edging
- Design your border
- Outline: Decide where you want a defined edge—around a flower bed, along a path, or framing a tree.
- Choose shells: Use similar sizes for a more formal look, or mix shapes for a whimsical feel.
- Create a shallow trench
- Depth: Dig a narrow trench about 2–3 inches deep along your border line.
- Width: Just wide enough to nest the shells side‑by‑side.
- Set the shells
- Orientation: Place shells point‑down, curved side out, or slightly angled for a sculptural look.
- Spacing: Fit them snugly to support each other and reduce shifting.
- Backfill and secure
- Fill gaps: Use soil, sand, or small gravel to stabilize the shells in place.
- Tamp gently: Press the soil around the shells to anchor them.
- Finish the bed side
- Add mulch or crushed shells: On the inside of the border, finish with mulch or shell to tie the look together.
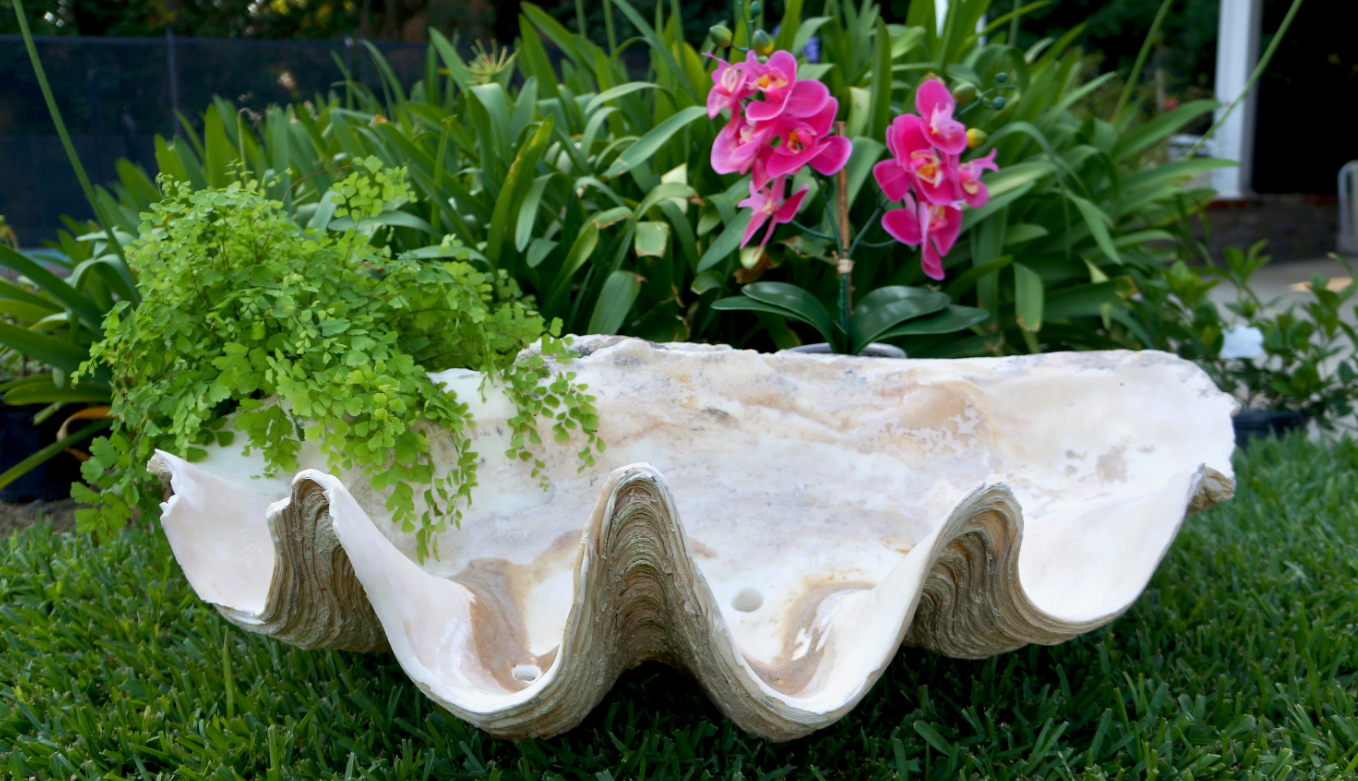
Idea 4: Decorative shell features and accents
Beyond practical uses, seashells can become focal points or subtle repeating motifs throughout your yard.
Examples of decorative shell uses
- Shell mosaic stepping stones: Press shells into wet concrete pavers or stepping stones for custom art.
- Dry creek beds with shell highlights: Mix shells with river rock to brighten a “stream bed” in a xeriscape.
- Planter toppers: Use shells as a top layer in container gardens to reduce evaporation and add texture.
- Themed corners: Use conch or larger shells in tropical or coastal‑inspired corners, paired with grasses and succulents.
Simple project: Seashell planter topper
- Fill container and plant as usual.
- Water well so soil settles.
- Spread a 0.5–1 inch layer of small shells or crushed shell over the soil surface.
- Keep shells 0.5–1 inch away from stems to avoid trapping moisture against them.
This keeps soil from splashing, reduces weeds, and gives a neat, finished look.
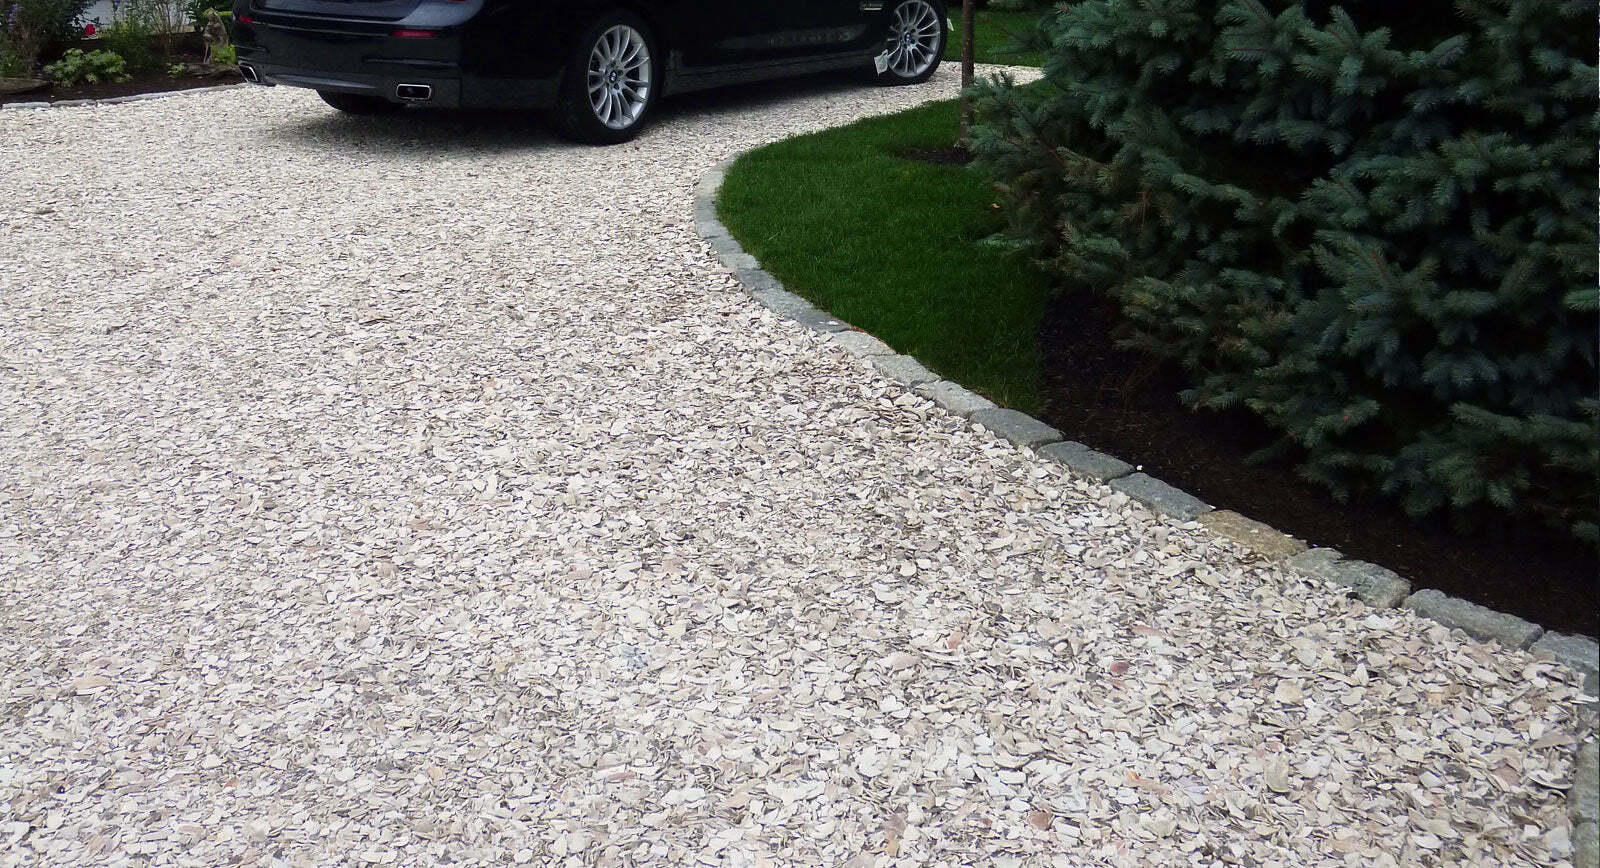
Idea 5: Driveways and large hardscape areas
For larger projects, crushed shells can even be used for driveways and wide sitting areas. Clam and mixed shells are common for this because they compact into a firm surface and offer good drainage.
Step‑by‑step: Crushed shell driveway (simplified)
- Check local regulations and base requirements.
- Grade and level the area for proper drainage.
- Install a substantial compacted base layer (gravel/road base).
- Spread a thick layer of crushed shell (usually 2–3 inches).
- Compact thoroughly with a plate compactor, then top up thin spots.
For driveways and structural areas, it’s wise to consult local pros or supply yards for recommended depths and base specs for your region.

Practical tips for working with seashells
- Source responsibly: Buying crushed shells or bulk shells from reputable suppliers ensures they’re cleaned and not removed from protected habitats.
- Match style to setting:
- Oyster and mixed shells: soft, natural, beachy look.
- Clam shells: rustic and classic.
- Conch and large decorative shells: bold, tropical statement pieces.
- Use moderation: A few shell features go a long way. Aim for “coastal hint,” not “pirate ship gift shop.”
- Mind your plants: Because shells can influence soil pH over time, they’re especially good for plants that tolerate or prefer slightly more alkaline soils.