
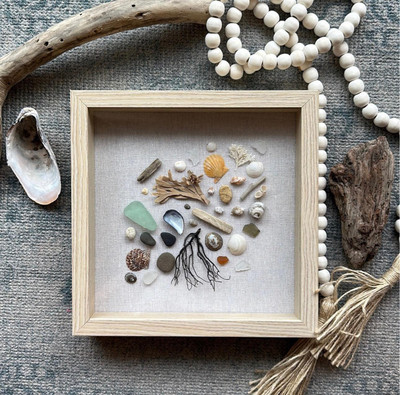
How to Create a Beautiful Seashell Shadow Box: A Step-by-Step DIY Guide
Seashell Supply on 9th Oct 2026
Seashells have a way of capturing memories. A shell picked up during a family vacation, a collection gathered over years of beach visits, or a handful of colorful shells chosen for a craft project can all become meaningful decorations. One of the most versatile ways to display these natural treasures is with a seashell shadow box.
Unlike a traditional bowl or open display, a shadow box allows you to arrange shells in layers, combine them with other coastal materials, and protect your finished design behind a frame. The result can be anything from a minimalist piece of coastal wall art to a detailed display commemorating a special trip.
Whether you're an experienced crafter or trying a seashell project for the first time, creating your own shadow box is an enjoyable way to turn individual shells into a cohesive work of art.
What You'll Need to Make a Seashell Shadow Box
The beauty of this project is that it doesn't require an extensive collection of expensive supplies. A few carefully selected materials can produce an impressive result.
Start with the following:
- A shadow box frame: Choose a frame deep enough to accommodate your largest shells without pressing them against the glass.
- A backing material: Linen, neutral fabric, textured paper, painted wood, or decorative cardstock can provide the foundation for your arrangement.
- Seashells: Combine different shapes, sizes, and colors to create visual interest.
- Adhesive: Select a glue appropriate for your backing and shell materials. Test it on an inconspicuous area first.
- Tweezers or small craft tools: These help position tiny shells and other decorative pieces.
- Optional accents: Small pieces of driftwood, sea glass, sand-colored paper, or a printed vacation date can give your display a personal touch.
For a coordinated design, consider browsing seashell assortments to find shells that complement one another in color and size.
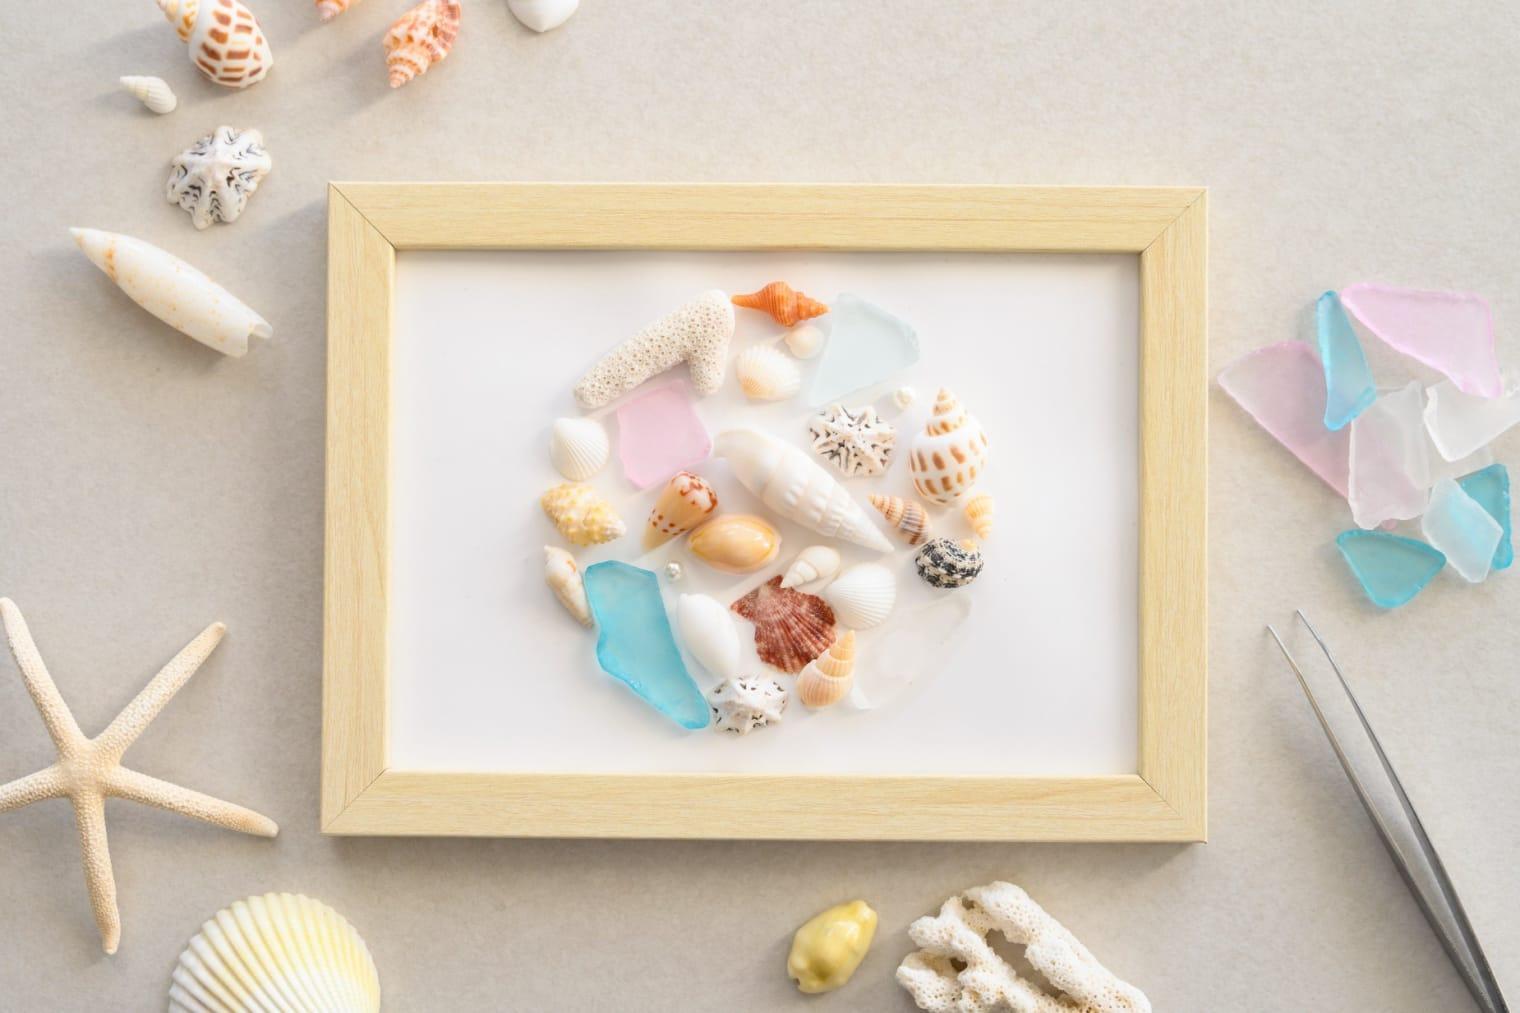
Step 1: Choose a Theme for Your Display
Before attaching anything, decide what you want your shadow box to communicate. A clear theme makes it easier to choose shells and arrange them in a way that looks intentional.
A few possibilities include:
A natural coastal collection: Arrange shells in their natural colors, using whites, creams, tans, and muted browns for a calm, understated look.
A colorful ocean display: Combine shells with contrasting colors and distinctive patterns to create a more playful design.
A vacation memory box: Incorporate a photograph, a handwritten location, or the date of a memorable beach trip.
A symmetrical arrangement: Place a large statement shell in the center and arrange smaller shells around it in balanced patterns.
A miniature underwater scene: Use shells of different shapes and sizes to suggest a small ocean landscape without overcrowding the frame.
Choosing a theme at the beginning prevents the finished project from looking like a random collection of materials.
Step 2: Select Shells With Different Shapes and Textures
An attractive shadow box doesn't necessarily need rare or expensive shells. In many cases, contrast is more important than rarity.
Look for a combination of visual characteristics. Smooth shells can balance ridged or textured ones. Small shells can fill spaces around larger specimens. A spiral shell can create a focal point among flatter, fan-shaped varieties.
Try selecting one larger shell as the main feature, several medium-sized shells to establish the composition, and smaller shells to fill the remaining spaces.
Before using any shells, make sure they're clean and completely dry. Inspect them for loose fragments or sharp edges, particularly if the finished piece will be handled frequently.
If you're purchasing shells for the project, check the listed dimensions and quantities. A photograph can make a shell appear larger or smaller than it actually is.
Step 3: Plan the Layout Before Gluing
Arrange everything on the backing before attaching any pieces. This simple step gives you the freedom to experiment without damaging the materials.
Start with your largest shells. Position them where you want the viewer's attention to go first. Then add medium-sized shells, distributing their colors and shapes across the design.
Finally, use the smallest shells to fill gaps or create borders.
One useful technique is to leave a little empty space between groups of shells. Negative space gives the eye a place to rest and allows distinctive specimens to stand out.
You can also experiment with depth. Some shells can sit directly against the backing, while others may be mounted slightly forward if the frame allows sufficient clearance. Make sure every piece is securely supported and won't shift when the frame is moved.
Take a photograph of the arrangement once you're satisfied with it. This will serve as a reference while you attach the pieces.
Step 4: Attach the Shells Carefully
Work in small sections rather than applying adhesive across the entire backing.
Use only as much adhesive as necessary to secure each shell. Excess glue can create visible marks, especially on dark paper or textured fabric.
Follow the adhesive manufacturer's instructions, including its recommended curing time. If you're working with delicate shells, test your chosen adhesive on a spare piece first.
Avoid forcing a shell into a position where it rocks or places stress on a fragile edge. If necessary, adjust the arrangement or provide additional support underneath.
Allow everything to dry fully before closing the frame.
Step 5: Add Finishing Details
Once the main arrangement is secure, consider whether the design would benefit from a few finishing touches.
A small label identifying a beach or vacation date can turn a decorative piece into a keepsake. A neutral background can make colorful shells stand out, while a darker backing may emphasize pale specimens.
If you want a more natural appearance, keep the additional decorations minimal. The shells themselves should remain the focus.
Before sealing the shadow box, check that no shell is touching the glass and that the backing fits securely inside the frame.
Creative Ways to Use Seashell Shadow Boxes
A finished shadow box can serve several purposes beyond ordinary wall decoration.
Create a collection of vacation memories for a hallway or family room. Make a personalized gift for someone who loves the ocean. Design several coordinating boxes to form a gallery wall, or create a display around a particular shell shape or color.
Shadow boxes can also be used for educational displays, where different shells are arranged by shape, size, or broad shell group. Labels can help viewers understand what they're seeing.
For event planners and craft businesses, a coordinated set of shell shadow boxes can provide inspiration for coastal-themed displays, gift products, or decorative installations.
Turn Your Seashell Collection Into Something Special
The best seashell shadow boxes are not necessarily the most complicated. They are the ones in which every material has a purpose and the overall arrangement tells a story.
Start with a simple frame, choose shells that work well together, and take your time planning the layout. As your confidence grows, you can experiment with more intricate patterns, layered designs, and personalized details.
If you're looking for materials for your next project, explore the seashells and mixed assortments available at Sea Shell Supply. With the right combination of shapes, textures, and colors, even a modest selection of shells can become a distinctive piece of coastal art.